Trusted and leading provider of sustainable waste management solutions from 20 years. (786) 655-7070

Used cooking oil is a part of every shift in a commercial kitchen. But improper handling of used cooking oil leads to burns, fires, and expensive accidents across the food service industry.
What really separates safe kitchens from risky ones? It comes down to clear procedures your team actually uses, day in and day out.
The right standard operating procedures can turn used cooking oil from a kitchen hazard into a safely managed resource.
When you cool oil properly, put on the right gear, store containers out of the way, and schedule regular pickups, you cut out the most common points of failure.
Those steps also help keep your kitchen cleaner and reduce contamination risks. It’s not just about safety—it’s about running a tight ship.

Commercial kitchens face real risks when managing used cooking oil. Burns can send workers to the hospital, and fires can shut down operations for days.
Most failures occur when staff skip safety steps, use faulty equipment, or ignore warning signs that oil containers are overfilled
| Handling Failure | Immediate Consequence | Business Impact |
| Pouring hot oil without cooling | Second or third-degree burns to hands, arms, and face | Worker’s compensation claims, staff shortages, and potential lawsuits |
| Overfilling storage containers | Oil overflows onto the floors, creating slip hazards | Employee injuries from falls, health code violations |
| Using cracked or damaged containers | Sudden spills, leaking oil during transport | Floor damage, pest attraction, and emergency cleanup costs |
| Ignoring container weight limits | Containers break during lifting, spilling hot oil | Severe burns, broken equipment, and production delays |
| Mixing water with used oil | Violent splattering when the oil is still hot | Burn injuries, oil contamination, and disposal problems |
| Blocking the oil storage area access | Staff rush and spill oil trying to reach containers | Workplace accidents, delayed use cof ooking oil disposal |
| Skipping grease trap maintenance | Trap overflows, oil backs up into kitchen drains | Flooded kitchen, health inspector citations, emergency plumber fees |
Your kitchen needs clear procedures for every failure point. Train staff to allow used oil to cool for at least two hours before transferring it to storage containers.
Mark fill lines on all oil containers. Don’t go over them, even if you’re slammed during a rush.
Check storage containers weekly for cracks, rust, or weak seals. If you see damage, swap the container immediately—don’t risk a nasty spill during transport.
Most commercial kitchen oil-handling injuries occur when workers try to move containers that are too heavy or unstable. Don’t let that be your team.

When handling used cooking oil in a commercial kitchen, you must follow specific safety standards. These rules protect you and your crew from injuries and accidents.
OSHA (Occupational Safety and Health Administration) sets legal requirements for workplace safety. OSHA develops and enforces standards that protect employees from hazards such as burns, slips, and fires.
Your business must follow these rules to remain compliant and avoid penalties. It’s not optional.
The National Fire Protection Association (NFPA) develops codes focused on fire prevention. NFPA develops roughly 300 codes and standards that address fire safety across different industries.
These guidelines help you prevent cooking oil fires and safely manage flammable materials. They’re not just red tape—they’re there for a reason.
SDS (Safety Data Sheets) provide critical information about the materials you use. Every chemical or substance in your facility should have an SDS that includes:
Following safety standards helps reduce accidents and make your workplace safer. These standards guide you on proper storage temperatures, container choices, and transfer methods.
Understanding OSHA requirements and NFPA guidelines helps ensure your cooking-oil safety protocols meet industry standards.
Train every staff member on safe oil handling. Keep those SDS documents where people can actually find them, not buried in some binder no one touches.
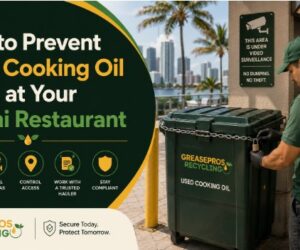
GreasePros Recycling provides free containers and scheduled pickup of used oil to keep your kitchen safer, cleaner, and compliant. Contact us to set up service.
If you’re ready to get started, call us now!
When you’re handling hot cooking oil, you need protection that fits the real risks. Generic PPE recommendations just don’t cut it because different kitchens have different hazards.
Heat-resistant gloves are your first line of defense against burns when you’re moving oil containers or working near fryers. Standard work gloves won’t protect you from oil at 350°F or higher.
Look for gloves rated above 400°F that extend past your wrists. They should cover your forearms, too—splashes don’t care where your glove ends.
You should also wear these when handling used cooking oil:
The real trick is matching PPE to the actual risks of the job you’re doing. Changing a fryer filter? That’s a different gear than pumping oil into an outdoor tank.
Before you start any task with hot oil, ask yourself: what could go wrong, and what do I need to protect?
OSHA requires employers to assess workplace hazards to determine whether PPE is required for each specific task. Don’t skip PPE just because the job seems quick or routine. That’s when accidents sneak up on you.
| Task | Minimum PPE | Recommended Add-Ons | Why it matters | Supervisor Check |
| Draining/filtering oil | Heat-resistant gloves, apron, eye protection, and non-slip shoes | Forearm guards | Prevent burns/splashes | PPE worn + intact |
| Transferring oil to a container | Gloves, apron, eye protection, non-slip shoes | Funnel/pump (engineering control) | Reduces spills + splatter | No “carry-and-pour” |
| Moving sealed containers | Non-slip shoes, work gloves | Dolly/cart | Prevent strain + drops | Correct lifting/cart use |
| Cleaning drips/spills | Non-slip shoes, gloves | Goggles if splatter risk | Oil is a slip hazard | Floor left dry |
| Checking the outdoor tank area | Work gloves, non-slip shoes | High-visibility vest (night) | Prevent slips + cuts; deter theft | Area clear + secure |
The riskiest part of handling used cooking oil is during cooling and transfer. Hot oil can cause severe burns and start fires if you don’t manage it properly.
Never move oil right after use. Let it cool down completely before you do anything.
Usually, that means waiting 2-4 hours, depending on how much oil you have and the type of container you’re using.
Check the temperature before you handle it. Oil should be at 100°F or below before you touch the container or start transferring.
Use approved oil caddies for transporting used cooking oil. These should have tight lids, heat-resistant materials, and sturdy wheels.
Don’t use makeshift containers—no cardboard boxes or thin plastic bins. That’s just asking for trouble.
Place your oil caddy as close to the fryer as possible before you start. The less you have to carry hot oil, the safer you’ll be. Make sure the path is clear as well.
Pour slowly and steadily. Rushing leads to splashes and spills. If oil spills during transfer, stop and clean it up before proceeding. Don’t leave a slip hazard behind for someone else to find.
| Step | Standard (what “good” looks like) | Tools / PPE | Stop-Work Trigger | Owner |
| 1. Verify oil is cooled | Oil is fully cooled before draining/transfer; no “warm carry.” | Heat-resistant gloves, apron, closed-toe non-slip shoes | Oil still hot/warm to the touch; steam/heat present | The shiftt lead assigns |
| 2. Prep the transfer zone | Clear traffic path; place wet-floor sign; spill kit staged | Wet-floor sign, absorbent, scraper | High foot traffic / rushed service | BOH lead |
| 3. Inspect container/tank | Container is intact, dry, stable, and correctly positioned | Approved sealed container/tank | Cracks, leaks, bulging, and a missing lid | Assigned handler |
| 4. Secure fittings/lids | Lids/fittings are ready for immediate sealing post-transfer | Lid, funnel/pump, clamps | Missing lid or loose fitting | Assigned handler |
| 5. Transfer oil safely | Use funnel/pump; slow controlled flow; no splashing | Funnel/pump, PPE | Splashing, unstable container, poor visibility | Assigned handler |
| 6. Seal + label immediately | Seal tight; label “Used Cooking Oil”; no open containers | Lid/lock ring, label | Lid won’t seal; label missing | Assigned handler |
| 7. Clean and verify a dry floor | Remove drips; confirm floor is dry + non-slip | Degreaser, absorbent | Floor remains slick after cleanup | BOH lead |
| 8. Log level + next pickup trigger | Record fill level and pickup trigger status | Log sheet/app | Near/over trigger level | Manager |
If you’re using cooking oil, you’ve got a critical two-minute window to start containment before it spreads and becomes a hazardous slip hazard.
Quick action here can really prevent injuries and spare you from a bigger cleanup headache.
Keep spill kits within 50 feet of all oil handling areas. Your kit needs absorbent pads, granular absorbent, a broom, a dustpan, and disposal bags.
Store these supplies in clearly marked containers so your staff can grab them quickly. No one wants to hunt for a mop when oil’s spreading across the floor.
Immediate Response Steps:
Never use water to clean oil spills—it just makes the surface slicker and spreads the mess. Stick to oil-specific kitchen absorbent materials.
Put up wet floor signs at every approach to the spill. Even after you clean up, a thin oil film can stay slippery for a while.
After removing the bulk of the oil, mop the area with a commercial degreaser. That’s the only way to really cut the residue.
Train your team on spill response and containment procedures during orientation and with quarterly refreshers. Log all spill incidents, including how quickly you responded and what you did to fix it.
Keeping these records helps you identify problem areas and refine your spill-prevention strategies over time.
Prevent spills and overflow with the right container size and pickup cadence—GreasePros Recycling can tailor a plan to your volume. Schedule service today.
If you’re ready to get started, call us now!
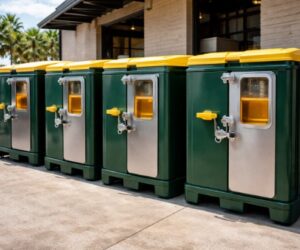
Properly storing used cooking oil helps keep your staff and facility safer. Your containers should have tight lids that seal completely to stop spills and cut fire risk.
Essential Container Requirements:
Label every container with what’s inside, the fill date, and any hazard warnings. Clear labeling keeps things simple and helps everyone handle oil safely.
Keep containers away from heat sources, cooking equipment, and open flames. Room temperature is best, since high heat increases pressure and fire risk. Don’t ever store hot oil above 120°F.
Set up containers in low-traffic spots where they won’t get bumped or knocked over. Put them on flat, stable surfaces, away from walkways and doors.
Use spill pallets or berms under storage areas to catch leaks before they spread. It’s one of those things you hope you never need, but you’ll be glad it’s there if you do.
Your grease management system should have storage zones separate from grease traps and active cooking areas. Keep aisles clear so staff can reach containers without climbing over items.
Check containers daily for leaks, damage, or overflow. Swap out worn containers right away and clean up any spills with oil-absorbent materials.
Every kitchen needs Class K fire extinguishers for cooking-oil fires, and every staff member should know that water can make grease fires explode and spread.
At the start of each shift, gather your team and point out the nearest Class K extinguisher. Have someone say its location out loud.
Then, ask a team member to recite the rule: “Never use water on a grease fire.” Water can make burning oil splatter and send flames across the kitchen. Class K extinguishers use wet chemicals that cool the oil and create a barrier.
Mount Class K extinguishers within 30 feet of all fryer stations and cooking equipment. Keep them at eye level where staff can spot them, even during a rush.
Show your team the PASS method: Pull the pin, Aim at the fire’s base, Squeeze the handle, and Sweep side to side. If the fire grows beyond a small pan, evacuate and call 911.
Setting up a used cooking oil collection schedule helps you avoid messy overflows and risky spills. You’ve got to match your storage capacity to the actual amount of oil your kitchen produces each week.
Track how many gallons of used oil you generate over two weeks. Busy restaurants and commercial fryers can produce 50 to 200 gallons a week. Once you know your average, you can set a pickup schedule that fits.
Don’t fill storage tanks past 80% between pickups. That buffer saves you when things get unexpectedly busy. Overfill prevention equipment helps you monitor levels in bigger setups.
Recommended Pickup Frequencies
| Weekly Oil Production | Suggested Pickup Schedule |
| Under 30 gallons | Every 2–3 weeks |
| 30–75 gallons | Weekly |
| 75–150 gallons | Twice weekly |
| Over 150 gallons | 3+ times weekly |
Increase collection frequency during peak seasons or when you’re slammed with special events. Most oil collection services can adjust their schedule to fit your needs.
If containers hit 75% full before the next pickup, or you see oil around the lids, it’s time to rethink your schedule. When staff start mentioning the container’s always full, don’t ignore it—adjust right away.
If your oil volume jumps, call your collection provider. They can swap in a bigger container or add extra pickups to prevent overfill hazards.
Used cooking oil is surprisingly valuable to oil-recycling companies like Mahoney Environmental. Thieves target restaurant grease containers to steal oil and resell it.
Protect your oil storage area from unauthorized access. Lock outdoor grease containers with heavy-duty padlocks or keep them inside a fenced enclosure.
Install motion-sensor lights around storage areas to scare off thieves. It’s not foolproof, but it helps.
Key Security Measures:
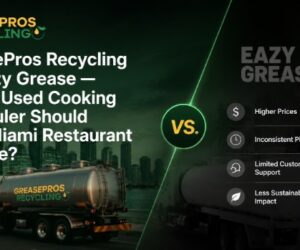
Work only with licensed oil recycling services that give you proper documentation. Companies like Mahoney Environmental provide collection records and proof of legal disposal. These records protect you if stolen oil causes environmental trouble.
Empty containers regularly to limit the amount of oil thieves can steal. Full containers draw attention, so schedule frequent pickups to keep storage time short.
Mark containers with your business name and contact info. If someone steals your oil, it becomes easier to trace. Some restaurants even use GPS trackers inside containers for extra peace of mind.
Check storage areas daily for tampering. Watch for busted locks, spills, or containers that seem emptier than they should. If you spot anything off, document it and let other local restaurants know about theft trends.
Accurate records protect your business during inspections. You need three main types of documentation ready at all times.
Temperature logs track oil heating and cooling cycles. Record the temperature before filtering, during transfer, and when you store oil in containers.
Jot down any time the oil exceeds safe handling temperatures. Don’t skip this step—it matters during inspections.
Training records demonstrate that your staff understands proper handling procedures. Maintaining proof of compliance for your organization means tracking who was trained, when they completed training, and what was covered.
Keep certificates and sign-off sheets for at least three years. It’s not glamorous, but it saves you headaches later.
Your pickup documentation should include:
Employee training records need to be inspection-ready because they demonstrate your commitment to workplace safety. Store them somewhere you can access quickly.
Set up a simple logbook near your oil storage area. Staff should record every transfer, filter change, and container swap.
Document control and training management systems let you track multiple locations from one platform. That’s pretty handy if you’ve got more than one site.
Keep disposal manifests and hauler licenses on file. These show that you’re working with licensed collectors and complying with waste regulations.
Digital copies work, as long as you can pull them up during an audit. Don’t let paperwork trip you up when it counts.
Need safer used oil handling fast? Get free containers, reliable pickups, and overflow support for commercial kitchens. Contact GreasePros Recycling.
What are the safest steps for handling commercial used cooking oil?
Safe handling means following a simple SOP: let oil cool completely, use PPE and transfer tools (no improvised pots), store oil in sealed labeled containers, keep the holding zone clean and secure, and schedule pickups before containers reach overflow risk.
How long should the fryer oil cool before transferring the food?
Transfer only after the oil has cooled to a safe handling temperature—never while hot or “warm enough to rush.” Cooling reduces burn risk, splashing, and container failure, especially during busy shifts when footing and visibility are compromised.
What containers should restaurants use to store used cooking oil safely?
Use durable, leak-resistant containers designed for commercial oil collection, kept tightly sealed and clearly labeled. Size containers to your volume so you don’t overfill—options often include 55-, 140-, and 240-gallon outdoor containers and under-counter tanks.
Can restaurants pour used cooking oil down the drain?
No. Pouring oil down a drain can clog pipes, create odors, and contribute to sewer overflows or costly plumbing issues. Instead, cool the oil, store it sealed, and use a used-oil pickup service for proper recycling.
How do you prevent spills and slip hazards during oil transfers?
Prevent spills by standardizing the transfer step: one trained owner per shift, clear the path, use funnels/pumps and stable containers, seal immediately, and clean drips fast. Oil creates slip hazards, so the “contain and dry the floor” rule is critical.
What fire extinguisher is used for cooking oil/grease fires?
Commercial kitchens should use a Class K fire extinguisher for cooking oil and animal-fat fires. Staff should also be trained on quick access and response basics, because using the wrong approach can worsen a grease fire.
How often should used cooking oil be picked up to avoid overflow?
Pickup frequency depends on volume, container size, and peak-week output. High-fry operations often need more frequent service to prevent overfill and unsafe staging. Use a fill-level trigger (not guesswork) and adjust cadence when volume spikes.
Founded with a vision to revolutionize the used cooking oil recycling industry, GreasePros Recycling has established itself as a trusted and leading provider of sustainable waste management solutions. With over 20 years of experience, our dedicated team brings extensive expertise and a commitment to environmental stewardship.
Quick Links
Contact Information
Get in Touch with GreasePros